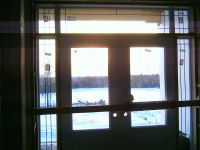
Accomplishments today:
- completed stairs from garage to basement
- installed landing platform at correct height in main stairwell (temporary stairs were at incorrect height) and modified temporary stairs to fit.
- constructed stairwell walls in basement
- drywall boarding completed for great room, powder room, main bath, linen closet, entertainment closet, foyer, and closet in laundry room.
This is a house blog once again. It is also an occasional dog blog, flower blog, and bird or other creatures blog...
Friday, December 30, 2005
Thursday, December 29, 2005
Day 266 - good progress today
 (click any picture for larger view)
Today the drywall crew started boarding the dining room. Charles, Sean and I stayed a bit later yesterday (until 5:45pm) to complete installing the sound insulation in the laundry room/dining room partition wall. This is the green stuff you see in this photo. It is pretty easy and fast to install if you have studs that are 16" on centre and there are no wires. But it gets tricky and time consuming when you add plumbing, wiring (120v, low voltage, and security) and hvac.
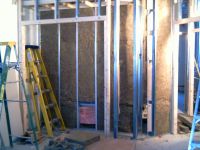 This is a photo of closet in the Office/BR3 - the main bathroom is behind the closet. What this photo shows is that I stuffed extra sound & other insulation in around the bathtub in the main bath. This will help keep the water warmer when you are having a bath, and also reduces the sound transmisison.
The sound insulation works quite well. As an experiment, when the drywallers were boarding the back bedroom, I went into the kitchen, and could tell that the sounds of their tools were noticeably attenuated - this was with no doors and one insulated partition wall. Then I went into the master bedroom (no doors and 2 insulated partition walls) and the sounds were attenuated such that they would have been drowned out by someone talking at a normal volume. Then I went into the master bath (3 insulated walls between the noise makers and myself) and couldn't even hear the drywallers' tools!
The philosophy about the sound insulation was to insulate all partition walls around the quiet spaces (the bedrooms) and the noise generating spaces (the bathrooms and laundry room). In reality, this meant almost all partition walls were insulated.
 The boys from Bytown were hard at work again. Here is Rob installing the channel that holds the soffit in place. They completed the soffit on the porch and started installing the aluminum wrap on the beam across the front of the porch.
Accomplishments for today:
- sound insulation completed.
- ceiling adjustment/levelling completed
- started building stairs from garage to basement (about 2/3 done)
- installed support for base for main stairs to basement
- drywall board installed in dining room, BR2, and office.
We will finish the stairs from garage to basement tomorrow, as well as make a good stab at the main stairs, and hopefully get that finished. The drywallers may or may not come in tomorrow, as it was freezing rain most of today.
Wednesday, December 28, 2005
Colour scheme
 This is our colour scheme.
Freda spent a significant amount of energy poring over various design magazines and books, in order to come up with a colour scheme that will flow harmoniously through the house and be appropriate for both the small and large spaces. I think Freda has done a wonderful job!
This is where the colours will be used (L-R, top to bottom):
- Cracker Bitz: Master bedroom, closets, etc
- Almond Brittle: All trim and most ceilings. (Bathroom ceilings will be the same colour as the walls.)
- Cabbage Patch: Laundry room, Solarium(?), Kitchen, Powder room
- Covington Blue: Office/BR3
- Beachcomber: Great room, Solarium (?), BR2
- Ginger Root: Foyer, hallway, Dining room
The top row are colours from Pittsburg Paints, Cabbage Patch is a CIL colour, and all the others are from Benjamin Moore.
Just to confirm the colours, Freda is going to pick up the large colour chips from Benjamin Moore, if available.
Day 265 - Status updates
 Wednesday December 28th, 2005
These photos were taken at the start of the day. Here you can see that the soffit and fascia has been started. The guys started on Tuesday and the job should take a full four days.
 The drywalling crew came in on Saturday, Christmas Eve, and partially drywalled the garage. Yesterday they boarded the kitchen, pantry, and part of the master bedroom. Today (Wed), they completed boarding the master bedroom closet and bath, and did the solarium.
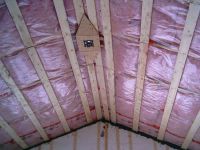 Meantime the crew has been busy. Yesterday, Dave and I were the only ones in, as Chris, Sean and Patrick took an extra day off to recover from turkey feasting.
On Tuesday, Dave installed the pocket door kit for the master bathroom (twice! it was 3/4" too low the first time - ooops!) while I installed the extra cable outlet for the great room and the sound insulation in the master bedroom. Charles came along and the three of us cleared the tools, materials, and debris out of the master bath and closets so the boarders could get in there. We proceeded to the great room where I installed the insulation around the powder room and the BR2 wall. Dave added a bit of strapping to the back wall of the solarium, levelled the ceiling and built the fan base shown here.
Today (Wed), the boarders completed the master bedroom closets and part of the master bath (except the cement board for the shower), and started in the solarium. Meanwhile the crew was busy with: completing remedying the leaky vapour barrier in the pot lights, installing strapping on the porch for the soffits, levelling the ceiling in the great room, office, and bedroom 2. Meanwhile, I continued with installing the insulation. One more day of insulation installation should see that task completed.
Friday, December 23, 2005
Day 260 - a day of many accomplishments
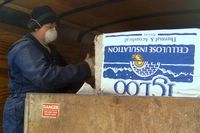 Sharon, feeding the hungry insulation blower. Sharon was helping Thorston because his regular crew called in sick that day. Thorston dragooned his wife (Sharon) to come in and help him since he had made a commitment to us to get the insulation done. Since it was Friday Dec 23rd, and Sharon had a lot of things to do, she would have preferred being elsewhere....
 Thorston, placing the blown cellulose. It was dark in the attic, and flash is not that powerful, so I pointed out Thorston using the pink arrow.
 Patrick spent the day identifying air leaks in the pot light vapour barriers, and remedying them. Here Patrick is doing a QA test with a smoke pencil. If the smoke just hovers, there is no air leak, if it blows away immediately - there is a leak that needs to be patched.
Every single pot light leaked air, some more significant than others, so it took a fair bit of time to remedy the issues with them.
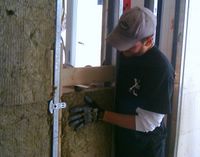 Sean, installing the sound insulation in the wall between the kitchen and master bedroom.
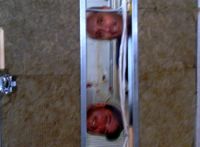 Dave and Sean, acting like their normal selves.
 This is the wall between kitchen and master bedroom with the sound insulation in place - this photo was taken from the kitchen side.
Thursday, December 22, 2005
Day 259 - A hectic day
These photos are blurry since I accidentally had the camera set on the close-up setting - sorry about that!
Chris has been sick all week, which has obviously been a problem for getting ready for the drywall.
 The truck with the drywall arrived around between 7:30 and 8am. This is Guy, operating the lift to unload the drywall. There was almost 20,000 square feet of drywall here. Guy lifted a load of drywall close to the door, and a couple of guys from the delivery crew put it onto a cart and moved it to the various rooms, where they unloaded it. This meant that the crew had to spend time cleaning up each room so the drywall could go in there.
 Here's the drywall arriving at the door.
Once the main level was tidied up, we had to tackle the basement. It was very very messy. First we swept where the drywall was going to be stacked and then started sweepiing up all the garbage. We filled two huge bags. Once the cleanup was completed, I installed the alarm wiring for basement windows where I wanted the wires concealed.
Meanwhile Sean and Patrick started remedying the vapour barrier seal around the potlights again. I brought in my smoke pencil which was helpful to confirm that the fixes had been effective. Sean was pulling back the tape which hadn't sealed, applying a bead of acoustic sealant between the layers of plastic, and then screwing a piece of strapping on top of it all to sandwich the seal.
At the same time, Dave was working on shimming the furring strips so we can have a level ceiling instead of a wavy one that would make you sea sick.
And in the basement, the drywall boarding crew, 3 young lads and their boss Paul, started applying the drywall board.
Sean and Patrick discovered the pot light over the desk needed a backer board, so Sean climbed up into the attic to fasten it. Just then, Larry came in to apply the aluminum trim over the garage doors. A 2x2 was fastened to the outside of the garage door jamb, but was unforunately too long on the sides and drooping on the horitzontal part on the top. So Dave and Sean had to drop everything to fix that. So they could do this, I removed the plastic that was fastened up over the doors (see photo from Day 255 - Dec 18th) and then reapplied it on the inside of the doors once the aluminum was in place.
Since the drywall boarders will likely apply the drywall on a couple of the walls in the garage after completing the basement, I started to move the 1x4 furring strips because there was a big pile of stuff that was in their way. As it was getting dark I didn't get this finished. This will be my first task tomorrow. My next task will be to install an alarm wire for the kitchen door and then a cable outlet in the great room.
There were other things that happened too - moving a switch in the wrong place, discovering some steel studs that were no longer fastened as the top track had been cut away completely, and I am sure there were another 1,001 things too that were done. So... today was very hectic, with the crew jumping from one task to another. We sure missed Chris!
Tomorrow... I will walk through the main floor with Charles and the electrician to make sure that everything is ready for drywall.
Chris has been sick all week, which has obviously been a problem for getting ready for the drywall.
 The truck with the drywall arrived around between 7:30 and 8am. This is Guy, operating the lift to unload the drywall. There was almost 20,000 square feet of drywall here. Guy lifted a load of drywall close to the door, and a couple of guys from the delivery crew put it onto a cart and moved it to the various rooms, where they unloaded it. This meant that the crew had to spend time cleaning up each room so the drywall could go in there.
 Here's the drywall arriving at the door.
Once the main level was tidied up, we had to tackle the basement. It was very very messy. First we swept where the drywall was going to be stacked and then started sweepiing up all the garbage. We filled two huge bags. Once the cleanup was completed, I installed the alarm wiring for basement windows where I wanted the wires concealed.
Meanwhile Sean and Patrick started remedying the vapour barrier seal around the potlights again. I brought in my smoke pencil which was helpful to confirm that the fixes had been effective. Sean was pulling back the tape which hadn't sealed, applying a bead of acoustic sealant between the layers of plastic, and then screwing a piece of strapping on top of it all to sandwich the seal.
At the same time, Dave was working on shimming the furring strips so we can have a level ceiling instead of a wavy one that would make you sea sick.
And in the basement, the drywall boarding crew, 3 young lads and their boss Paul, started applying the drywall board.
Sean and Patrick discovered the pot light over the desk needed a backer board, so Sean climbed up into the attic to fasten it. Just then, Larry came in to apply the aluminum trim over the garage doors. A 2x2 was fastened to the outside of the garage door jamb, but was unforunately too long on the sides and drooping on the horitzontal part on the top. So Dave and Sean had to drop everything to fix that. So they could do this, I removed the plastic that was fastened up over the doors (see photo from Day 255 - Dec 18th) and then reapplied it on the inside of the doors once the aluminum was in place.
Since the drywall boarders will likely apply the drywall on a couple of the walls in the garage after completing the basement, I started to move the 1x4 furring strips because there was a big pile of stuff that was in their way. As it was getting dark I didn't get this finished. This will be my first task tomorrow. My next task will be to install an alarm wire for the kitchen door and then a cable outlet in the great room.
There were other things that happened too - moving a switch in the wrong place, discovering some steel studs that were no longer fastened as the top track had been cut away completely, and I am sure there were another 1,001 things too that were done. So... today was very hectic, with the crew jumping from one task to another. We sure missed Chris!
Tomorrow... I will walk through the main floor with Charles and the electrician to make sure that everything is ready for drywall.
Wednesday, December 21, 2005
Day 258 - Failed air test
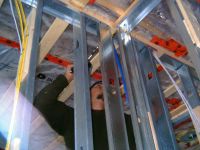 Wed Dec 21st, 2005
The air test was planned for this afternoon. As part of the preparation for it, Patrick was going around the building, double checking that all the openings are foamed properly.
As the drywall is being delivered tomorrow, Sean was outside using the snowblower to clear a space for the boom truck to come in and deliver the drywall.
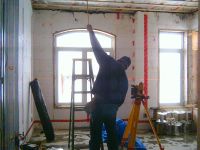 While waiting for Mike to set up the air test, Dave continued his work with leveling the ceilings. Some of the trusses had lifted, and were uneven due to the changing directions of the trusses. Here is Dave using the laser level to make the ceilings level.
Note the red line of the laser on the wall. Dave finds the lowest point on the ceiling and then measures the distance from that point to the laser line. Then Dave shims the furring strips down to the same point, so the distance from the laser line is the same as in the lower point.
 This is the blower door setup for air test. The operator, Michael, installs the door, sets up the gages and adjusts for the air pressure. The test is started by turning on the fan, seen in the lower part of the door, which tries to blow the air out of the house. If there are leaks, air is sucked through them and the air pressure in the house doesn't really lower much.
 The result - we have 1.8 ACH (air changes per hour) instead of the 1.5 required (150 on the identified scale). The bottom gauge was fluctuating from 200 to 220 which meant there is some opening somewhere which is fluctuating.
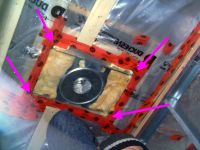
Air is leaking primarily from the four courners of the pot light vapour barrier.
It was "very challenging" for the crew to seal around the pot light vapour barrier due to the way they were installed by the electricians. Freda wants to give them a piece of her mind and deduct something from their bill.
Anyway, this has delayed completion of the main level for drywall.
I talked with the drywaller, and the drywall board is being delivered tomorrow (Thursday). The drywallers were supposed to start on Friday but they want to start tomorrow. Since the basement hasn't had an electrical inspection, it is unlikely that they can start anything until Saturday or Monday or Tuesday, whatever their next working day is.
On the main level, the crew needs to reseal around all the pot lights, shim the furring strips in some rooms (due to truss shrinkage), move a switch, complete the framing for the stair well, a half wall for a column, and around the shower in the master bath.
On the other hand, the guy who is supposed to do the soffit/fascia/etc was supposed to come today. He delivered the materials but nobody showed up to start installation. That has to be done before the garage doors can be installed.
In the same trend, the insulator can't come tomorrow (Thursday) but will come on Friday. That will be good as we will be able to stop heating the outdoors.
Monday, December 19, 2005
Day 256 - driving for drywall
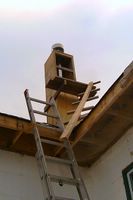 Monday Dec 19th, 2005
Everyone is driving for the drywall. The plan is to be ready to start drywalling on Thursday, so the punch list of things to complete for then is steadily shrinking.
One thing that wasn't on the punch list but was on the annoyance list - was the wrong chimney cap is replaced. The fireplace people came and straightened out the pipe supports and installed the correct cap.
 This is Chris tacking up furring strips. They will need to fastened in properly for the air test and also for the the insulation. The insulation guy should be ready to roll with the insulation on Wednesday.
 electrician and plumber discussing some topic in the laundry room.
Andre - got the heat going
Nick - wiring basement, moved boxes that were at the wrong height above the desk
Plumber finishing up rough drywall
Buchan, Lawton, and Peron - scheduled for air test
Called in request for electrical inspection on main floor
Things to do: Go over central vac locations, review partitions with sound insulation
Call Thorston to schedule attic insulation.
Sunday, December 18, 2005
Looking ahead this week
Things to do so drywall can start on Thursday:
1. Vapour Barrier inspection - Charles will call on Monday morning.
2. Complete strapping installation.
3. Complete framing around fireplace.
4. Complete framing around shower in master bath, includes wood jamb for edge of door and shower base.
5. Complete shower base for Tawny washing area in the laundry room.
6. Complete central vac rough-in.
6. Complete electrical work: A few things left to do: move the pantry light from a wall where the fixture won't fit to above the door where it should have been, lower the box for a closet light that was installed before the closet ceiling was dropped to 8', and move a 120V wire that was run through the same hole in the floor as the networking -- a major no-no.
7. Complete plumbing rough-in. I thought this was supposed to have been done a week and a half ago.
Supplies:
We ordered the trim supplies last week. They should be delivered towards the end of this week.
Flooring supplier has missed what seems like his 4th or 5th appointment to take measurements. We are concerned about getting the materials in time and therefore causing a delay. However, Mike called us on Friday to say that all the products we want are stock items with his suppliers and there should be no problems getting it in for us.
Day 255 - The week in review
 Drive up - Sunday December 18th, 2005
As noted in Saturday's blog entry, we received 25cm between Thursday and Friday evening. This meant we had a lot of snow in the driveway. Since we need to have easy access for the various trades on Monday, Charles brought his snowblower over in the morning before church and we cleared out the driveway in fairly short order.
This photo also shows some of my handiwork from yesterday. Due to the wind conditions, a fair bit of snow blew in the two south facing doors. The crew stapled some poly up over the doors but the wind blew it off, so I fastened some strips of wood over the poly to hold it down. Even with the strapping on the edges of the garage doors, the plastic was flapping a lot. I fastened some strapping across the middle of the door to take some of the pressure off the plastic.
 I haven't had a photo of Tawny for a while now, so here she is doing what we call her "soldier sit". She does this very upright sit posture when she is showing how good she is so she can get a treat -- very cute. You can see that Tawny has what is called "snow nose". A dog's nose should be black (or else it is considered a flaw by judges in dog shows), but dog's who sniff a lot - like Labs - stick their nose in the snow and the cold causes frostbite at the cellular level, causing the pink tones.
In the heading I promised "the week in review". So here is a review of the blog entry from Monday, Dec 12th:
Day 249 - Things for this week
Taking cover off to straighten chimney
Chimney guy didn't call back, so I faxed him a photo of the crooked chimney with a note that it was unacceptable. He called back 2 days later and left a message to call - I called back on Thursday morning and just got his voice mail. No response yet.
Heating guy there to finish hvac.
I actually think this was done.
Started on poly and strapping
Poly completed on Saturday, thanks to Dave. Started tacking strapping into place.
Charles will call for an inspection of the vapour barrier.
Drilled hole for electric supply for island - twice.
Well, that was last week actually.
Drywall guy was there to measure for quote
We received a quote last week from one company, and received another from the guy we would prefer to use on Wednesday. Unfortunately, the quote from the preferred guy was 23% higher than the first company. I negotiated a reduction in his price to match the first company.
Get heat on boiler for air-side by end of week
Didn't happen. The heating plumber had trouble getting things going - the water wasn't flowing through the coil in the air exchanger for some reason. As it was about 5pm, he said he would come back on Friday and get it going. Unfortunately, the weather made driving difficult in the morning and he never came out at all. So we still don't have heat.
We did have a propane tank heater in the basement but it ran out sometime on Friday night. The temperature in the basement on Saturday was 46F which was no problem for frost on the water pipes. I brought in the propane tank from our barbecue today and hooked it up to the heater but didn't fire it up as it was still 47F in basement.
Saturday, December 17, 2005
Day 254 - A catch-up day
 Saturday December 17th, 2005
Today was a bit of a catch-up day. Due to weather conditions (we had about 20cm of snow overnight on Thursday and another 5cm or so on Friday) and other things, the crew didn't quite get the poly (vapour barrier) installed and sealed - with red tape at joints and acoustic sealant at the perimeter. Because of that, Dave went above & beyond the call of duty by coming in on Saturday to finish the poly taping and "black death" (acoustic sealant).
 While Dave was finishing the poly, I cleaned up the house. There were lots of little pieces of poly all over the floor plus various sawdust, bits of wire, and other construction debris. This was a critical thing to do as the poly is quite slippery and is a hazard. After I picked up the big stuff, and swept up most of the other stuff, I fired up my shop vac and vacuumed the rest of the little bits.
I took these photos after the clean up. This photo is looking at great room from from entrance.
 This photo is looking at front entrance from great room. I was standing in front of the scaffolding that you can see in the previous photo.
You can see the arch more clearly in this photo. The arch is actually exactly the same radius arc as the center window in the great room.
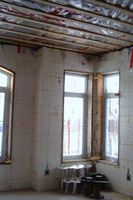 This is the office, and you can see what it looks like with the strapping in place. It is just tacked up for now, but will be nailed in securely next week.
You can see the empty spools of wire of wire here. There are 15 spools, each was 150m or almost 500ft. There are a few other spools of wire that are in use but not yet finished. Just counting the empty spools, that means there is over 2.25 km (1.42 miles) of wire in the house.
Wednesday, December 14, 2005
Day 251 - Glass in doors
Monday, December 12, 2005
Day 249 - Things for this week
Taking cover off to straighten chimney
Heating guy there to finish hvac.
Started on poly and strapping
Drilled hole for electric supply for island - twice.
Drywall guy was there to measure for quote
Get heat on boiler for air-side by end of week
Heating guy there to finish hvac.
Started on poly and strapping
Drilled hole for electric supply for island - twice.
Drywall guy was there to measure for quote
Get heat on boiler for air-side by end of week
Sunday, December 11, 2005
Day 248 - The end of a pane-ful experience (almost)
 Sunday December 11th, 2005
If you've been following this blog, you know that the windows were received with grills in the transoms and not in the main casements. Unfortunately, because the grills in the casements wouldn't line up with the ones in the transoms, the transom sealed units needed to be replaced also.
The replacement sealed units (with the grills) arrived, and Steve came out and replaced some of the sealed units. Steve also changed the door from the garage to the laundry room. Steve wasn't able to change the windows in the front doors because the battery in his cordless drill died.
The "(almost)" in the heading refers to the transom in the dining room. Part of the grill in the replacement transom came with a crooked piece, a manufacturing defect. So this sealed unit will have to be replaced again! What a pane! (haha)
We appreciate John and Steve sorting out the windows, so we received what we had ordered.
The windows look pretty good, don't they?
Friday, December 09, 2005
Day 246 - Didn't quite make it
The title refers to the electrical inspection. We had expected to have it today, but we didn't quite make it. It is now scheduled for Monday. The networking and alarm prewire will happen on Sunday. The insulator will come and start doing the batts for the cathedral ceiling on Monday. The poly and strapping will start after the electrical inspection, with the plan to have the blower door test this week, and then start drywalling.
 In Day 244's post I mentioned the chimney is not straight. Here is a photo of it - you don't need to zoom in to see that it is not straight. Unfortunately, it will take more than just changing the chimney cap as the chimney is strapped in crooked all the way up. I've called the chimney guy but he hasn't responded. It will be very challenging for them to fix it if they delay too long.
 For the sake of something different, I took a photo of the the house fom Howie Rd. It nestles into the tree line nicely with no lights on.
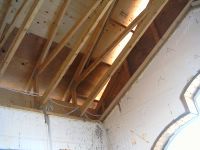 Thiis is a photo of the baffles under the roof. These baffles are part of the R2000 spec, and their purpose is to prevent wind from riffling through the insulation and cooling it off. After all, insulation works on the principle of trapped air so if the air is moving it makes sense that you will benefit if you can prevent this. Here is a CMHC quote:
 The replacement sealed unit windows have arrived. They are scheduled to be installed on Sunday. We are glad about that as the previous install date we had was after Christmas.
 In Day 244's post I mentioned the chimney is not straight. Here is a photo of it - you don't need to zoom in to see that it is not straight. Unfortunately, it will take more than just changing the chimney cap as the chimney is strapped in crooked all the way up. I've called the chimney guy but he hasn't responded. It will be very challenging for them to fix it if they delay too long.
 For the sake of something different, I took a photo of the the house fom Howie Rd. It nestles into the tree line nicely with no lights on.
 Thiis is a photo of the baffles under the roof. These baffles are part of the R2000 spec, and their purpose is to prevent wind from riffling through the insulation and cooling it off. After all, insulation works on the principle of trapped air so if the air is moving it makes sense that you will benefit if you can prevent this. Here is a CMHC quote:
Windwashing occurs where wind blows through insulation disturbing the trapped warm airpockets replacing them with cold exterior air on a constant basis. The effect of this is to seriously degrade the effective resistance value of the insulation. Therefore wind washingmust be minimized as part of the insulation process.
 The replacement sealed unit windows have arrived. They are scheduled to be installed on Sunday. We are glad about that as the previous install date we had was after Christmas.
Wednesday, December 07, 2005
Day 244 - pot lights
 Saga of the pot lights
We have a lot of pot lights in our house, Candice Olson would be proud! We have pot lights in the dining room, in the hallway (or the "gallery" as it is called on some plans!), in the kitchen, in the bathroom (shower light), a few in the master bedroom, and of course in the great room.
This story is about the pot lights in the great room.
The great room is planned to have 6 pot lights in total - 4 in the "corners" of the room, and two to accent the front corners of the fireplace. Unfortunately, one of the pot lights on the fireplace is in the wrong place, which means it will need to moved over a little bit, which then forces the 2 adjacent pots to be moved.
In other news, the electrical work will be completed tomorrow, and an inspection for the electrical and the framing (roof trusses) is requested for Friday. As soon as the inspectors come, then the crew will start installing the vapour barrier and the strapping for the drywall.
The plumber will also come out on Friday and complete the roughin. I need to get the fitting for the "utility tub" in the laundry room so it can be plumbed in. Also, the HVAC guys will come and complete their ventilation installation.
The fireplace installation is complete, but they put the wrong cap on the chimney, Charles says it is crooked. Since it's been getting dark when I was on my way out there I didn't see it so will have to call them tomorrow about that.
I am waiting for the networking and security installation people to confirm the installation date.
Insulators are booked for Monday. Then we will need an inspection for that (Tuesday) and an air test (Tuesday).
Drywall could start Wednesday, but we are still waiting for their quotes. I guess it will be hard for that to be completed by Friday. Charles said, with a wry grin, that he thought that was "a bit of a stretch".
The aluminum soffit and fascia installation will start next Friday. Once that gets started, the garage doors can be installed. I sincerely hope we can get the garage doors installed before Christmas.
Tuesday, December 06, 2005
Day 243 - cheap lights
Electrician Dave said that he wouldn't want to install our permanent exterior lights until the exterior is completed. Since only the hanging light will be able to be installed (once the soffit is completed), I purchased some cheap lights for the other locations. Only $5.95 each.
Monday, December 05, 2005
Completion Plan
This is Dave's and Charles' plan (from about a week ago) to complete our house for the end of January.
Week of: Description
Week 1 (Nov 28): Electrical, plumbing, central vac rough in, interior framing. Tubs and toilet delivered.
Week 2 (Dec 5): Complete electrical, plumbing rough in. Poly and strapping.
Week 3 (Dec 12): Strapping, drywall, insulation.
Week 4 (Dec 19): draywall, mud, sanding, priming / prime check.
Dec 26: no plans - catch up.
Week 5 (Jan 2/06): Mud, levelling, flooring
Week 6 (Jan 9): Doors, painting, cabinets
Week 7 (Jan 16): Trim, Electrical, plumbing finishing.
So... lots of time!!!
In other action... another drywaller and painter came to measure and give us a quote. Also a guy who does railings came to give a quote for the stairs to the basement.
Day 242 - Fireplace installation
Monday, December 5, 2005
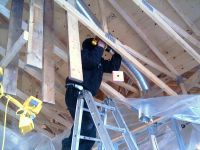 The fireplace arrived today. This is a photo of Randy, one of the the installers at work inside, fastening the chimney in place with strapping. Unfortunately, they only had a 20' section of the chimney, and needed to get another 10' piece to complete the installation. In addition, they were also missing the the propane field conversion kit. They expect to be back on Wednesday or Thursday to complete the install.
 While the fireplace installers were fastening the chimney inside, Dave and Charles were covering up the chimney box outside. Here you can see Dave "hanging around", after putting the last piece of plywood on the chimney.
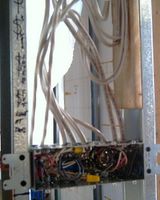 Electricians have been busy, wiring away. This gang of 5 switches is by the front door. Lots of switches!!! Let's see if I can remember what they are all for: inside foyer, outside door, garage lights, eave plugs. Okay - that's only 4 so I am missing one.
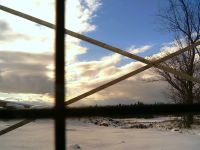 This is the view out of basement window looking towards the lake. The wide bars are the grilles in the window and the X is the scaffolding that's in place at the front of the house.
 The fireplace arrived today. This is a photo of Randy, one of the the installers at work inside, fastening the chimney in place with strapping. Unfortunately, they only had a 20' section of the chimney, and needed to get another 10' piece to complete the installation. In addition, they were also missing the the propane field conversion kit. They expect to be back on Wednesday or Thursday to complete the install.
 While the fireplace installers were fastening the chimney inside, Dave and Charles were covering up the chimney box outside. Here you can see Dave "hanging around", after putting the last piece of plywood on the chimney.
 Electricians have been busy, wiring away. This gang of 5 switches is by the front door. Lots of switches!!! Let's see if I can remember what they are all for: inside foyer, outside door, garage lights, eave plugs. Okay - that's only 4 so I am missing one.
 This is the view out of basement window looking towards the lake. The wide bars are the grilles in the window and the X is the scaffolding that's in place at the front of the house.
Sunday, December 04, 2005
Day 241 - it's the cold & flu season...
...and -- guess what?? -- I have a cold. It was milder here today than yesterday, but I felt not so good so I didn't go out at all. Freda very kindly went out and got some more Halls for me.
We had planned to go to the land and throw the kong for Tawny today, but didn't because of the cold.
Robutussin and Sudafed... here I come!
We had planned to go to the land and throw the kong for Tawny today, but didn't because of the cold.
Robutussin and Sudafed... here I come!
Saturday, December 03, 2005
Day 240 - finalized the cabinets
Yesterday I started feeling pretty lousy at in the afternoon, with the same symptoms of the cold that plagued the crew this past week. Drat!
Given that I was feeling under the weather, today felt very busy although it wasn't really. We met with Heinz the cabinet maker yesterday evening, and although we had a very good idea about the handles, we needed to finalize the laminate counter tops selection for the main bath and the laundry room. So today we went to the kitchen design center and selected Formica Madras Indian Slate.
On the way back we went to the Orange Borg to pick up the sink and faucet for the powder room which had arrived. While we were there, we checked out the cabinet handles as well as the undercabinet lighting. Since Freda wanted a special knob (knob A on this page) from Lee Valley for the laundry room, we popped over there to pick these knobs up. There is no other brass colour in the house other than these knobs.
Last week I calculated how much energy would be required to heat up the slab. Unfortunately, the house was not closed up and heat turned on before it got quite cold. Now the themal mass of the concrete floors are working against us, as we have to heat up all that concrete. These are the calculations I did then. I think you can follow along with reasoning.
Mass of concrete
23 cubic meters of concrete for both main floor and basement floor. This translates to 30.08 cubic yards per floor. One cubic yard of concrete weighs 4000 pounds, each floor has 120,000 pounds of concrete (60 tons) to be heated.
Temperature differential
Let's assume the main floor is at -5C, and the basement floor is +2C. Let's further assume that we want to get the floors to +15C, which would be a temperature for working in, drywalling, etc. This means we need to heat the main floor by 20C and the basement by 13C.
Energy (BTU) cost
1 BTU is the energy required to heat 1 pound of water by 1 degree Fahrenheit. Lets assume that this applies to concrete also. So we have to convert the Celsius temperature diff to Fahrenheit and multiply by the weight of the concrete.
20C transition is 36F (main floor), and the basement 13C is 23.4F. Multiplied by the weight of the concrete, we get a requirement of 7.1 million BTUs to heat up both slabs.
Heating efficiency
However, since the main floor slab is below freezing, the water would freeze in the pipes if we ran the hydronic heating first -- this would not be a good thing. Since we need to heat the air first to heat up the slab, we are not going to get great efficiency as this is not as efficient as direct heat transfer through the hydronic system. For now, let's assume that the heating efficiency is 60%.
Propane requirement
Propane has 91,000 BTUs per gallon. Given the BTU requirements (7.1M), and heating efficiency (60%), we come up an estimated 131 gallons of propane(US gallon) to heat both slabs to 15C.
Do we have enough propane?
We should have had 3 big tanks delivered, but they only delivered two. The three tanks hold 1100 litres, so our two tanks should contain about 733 litres. Converted the estimated volume of propane required into litres, we get 495 litres required.
So we do have enough propane in the big tanks, although it will use about 70% of the tanks' contents. This translates to a cost of approximately $400.
It really is too bad we weren't able to get the vapour barrier on sooner so we didn't have this extra expense.
Friday, December 02, 2005
Day 239 - more photos
Friday December 2nd, 2005
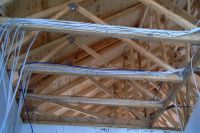 These electricians are running all the wire for the various circuits through the attic space. These neat bundles of wire all come to this wall in the master ensuite bath and will run down the outside of this wall (in the garage) to the panel in the basement.
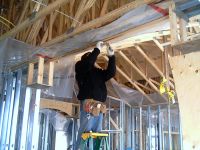 This is Dave preparing for the arch from kitchen to great room. Dave had some great ideas to make sure the arches have a similar look and appear balanced..
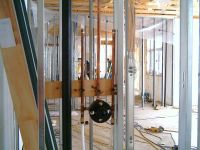 This is one of the things the plumber urgently needed - this is the shower control installed in the master bath shower area. The other parts (tubs, etc) are in the basement for when they are needed.
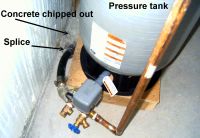 The pipe from the well was cut right above the level of the concrete. The speculation is that this was done by the floor finishers. This meant the concrete had to be chipped out from around the pipe, the damaged section removed, and then a new piece spliced in. The chipped out concrete will need to be filled in after.
 These electricians are running all the wire for the various circuits through the attic space. These neat bundles of wire all come to this wall in the master ensuite bath and will run down the outside of this wall (in the garage) to the panel in the basement.
 This is Dave preparing for the arch from kitchen to great room. Dave had some great ideas to make sure the arches have a similar look and appear balanced..
 This is one of the things the plumber urgently needed - this is the shower control installed in the master bath shower area. The other parts (tubs, etc) are in the basement for when they are needed.
 The pipe from the well was cut right above the level of the concrete. The speculation is that this was done by the floor finishers. This meant the concrete had to be chipped out from around the pipe, the damaged section removed, and then a new piece spliced in. The chipped out concrete will need to be filled in after.
Thursday, December 01, 2005
Day 238 - framing almost complete.
Thursday - December 1st! December??? Wow! Time is sure flying.
Well, I got to the house in daylight today, so was able to take some photos. Lots of progress to show you.
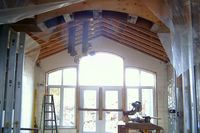 This is the arch from the hallway to the great room. Note that the radius of the curve here matches the radius of the curve on the top of the window. The plastic obscures the partition a bit, but it will be beautiful. There will be a column on each side of the opening to the great room.
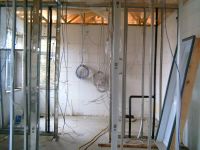 This photo is looking using the special X-Ray Vision setting on the camera to see through the wall of the closets to the master bath. There are lots of wires and plumbing. The plumbing store that is supplying our fixtures delivered the two tubs, a toilet, the bath faucets, and the shower valves.
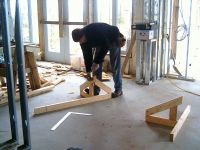 Dave is taking advantage of the nice weather to build the last of the returns for the gable ends. We are supposed to get some light snow tomorrow, so there won't be too much more opportunity to do this. Snow usually doesn't stick here until after mid-December, but that is only 2 weeks away!
 This is a photo of the basement. As you can see, there is lots of plumbing etc... here. The plumbers are using this white tubing for the main part of the plumbing. Since the tubing looks the same, how do you tell teh hot and cold supply apart? Well, the plumbers put black tape on the cold supply.
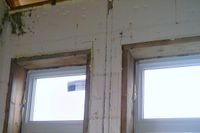 As part of the weather proofing, all the gaps around the windows and doors are foamed, as well as the sill plate and the cuts in the foam created by the electricians when they are doing their work. You can see all the foam around the windows and the sill plate in this photo.
 Here Patrick is installing the hurricane clips on the trusses. Patrick wasn't feeling well so he went home a few minutes after this.
In other developments...
Fireplace... installation scheduled for Monday
Countertops... we originally wanted to get granite counters for the kitchen and master bath. However, when we changed the sink/faucet for the powder room, we thought we would like to get granite for the powder room as well. The company that we were going to hire to supply the granite quoted us what we considered an outrageous price for that 3' piece of granite. (Just to show how unreasonable it was, the Orange Borg price was only $31 more -- and the OB is one of the most expensive.) We found a local granite supplier that will supply and install all the granite, including the powder room, for a slightly lower price than our initial supplier. (If they hadn't been so unreasonable about the powder room counter we never would have looked for another quote...)
Well, I got to the house in daylight today, so was able to take some photos. Lots of progress to show you.
 This is the arch from the hallway to the great room. Note that the radius of the curve here matches the radius of the curve on the top of the window. The plastic obscures the partition a bit, but it will be beautiful. There will be a column on each side of the opening to the great room.
 This photo is looking using the special X-Ray Vision setting on the camera to see through the wall of the closets to the master bath. There are lots of wires and plumbing. The plumbing store that is supplying our fixtures delivered the two tubs, a toilet, the bath faucets, and the shower valves.
 Dave is taking advantage of the nice weather to build the last of the returns for the gable ends. We are supposed to get some light snow tomorrow, so there won't be too much more opportunity to do this. Snow usually doesn't stick here until after mid-December, but that is only 2 weeks away!
 This is a photo of the basement. As you can see, there is lots of plumbing etc... here. The plumbers are using this white tubing for the main part of the plumbing. Since the tubing looks the same, how do you tell teh hot and cold supply apart? Well, the plumbers put black tape on the cold supply.
 As part of the weather proofing, all the gaps around the windows and doors are foamed, as well as the sill plate and the cuts in the foam created by the electricians when they are doing their work. You can see all the foam around the windows and the sill plate in this photo.
 Here Patrick is installing the hurricane clips on the trusses. Patrick wasn't feeling well so he went home a few minutes after this.
In other developments...
Fireplace... installation scheduled for Monday
Countertops... we originally wanted to get granite counters for the kitchen and master bath. However, when we changed the sink/faucet for the powder room, we thought we would like to get granite for the powder room as well. The company that we were going to hire to supply the granite quoted us what we considered an outrageous price for that 3' piece of granite. (Just to show how unreasonable it was, the Orange Borg price was only $31 more -- and the OB is one of the most expensive.) We found a local granite supplier that will supply and install all the granite, including the powder room, for a slightly lower price than our initial supplier. (If they hadn't been so unreasonable about the powder room counter we never would have looked for another quote...)
Subscribe to:
Posts (Atom)
