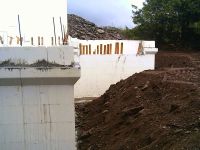
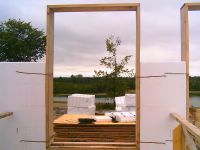
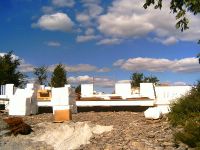
The backfill has started - yippee! The backfill needs to be completed before the installation of the ICF blocks for the main floor can be finished. This is because it would be otherwise impossible to install and brace the ICF for the garage wall without some pretty major scaffolding. As you can see, half of this pile is now gone to fill in the hole in front of the garage doors.
Here you can see where half of that pile went. The excavated hole used to be rectangular, and a large piece of the corner has been filled in. Next, sand or fine pit run gravel will be placed next to the wall, for a foot or so out, before putting any more raw material with the larger rocks in. The piles of rock with the really large rocks can't be used for backfill and we will likely have to pay to get it hauled away. A few months ago, we had a few people who may have taken it away for us for nothing, but that didn't happen for various reasons. Those people made other arrangements, so now we are stuck with paying for the trucking.
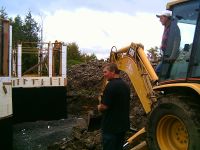
This is Charles talking with Perry the backhoe operator. Some of the rocks were large and were too close to the ICF walls, so Charles was asking Perry to pull that material back a bit.
BUDGET NOTE: In probably one of the only money saving items, we previously made an arrangement with Steve Berry to purchase some fill material (sand, gravel, etc.) for a good price. The added bonus is the material is virtually on site so the trucking costs will be very small. At least that takes the sting out of paying to haul that excess material away.
Also, we will be able to use some of the larger rocks for a retaining wall, so at least they won't all need to be hauled away!
This is a house blog once again. It is also an occasional dog blog, flower blog, and bird or other creatures blog...
Wednesday, August 31, 2005
Happy Birthday Charles!
Tuesday, August 30, 2005
Day 145 - Setting up main floor scaffolding
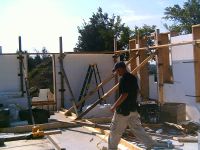
Patrick back at work after injuring his hand and getting five stitches. Fortunately no tendons or bones were nicked in the injury, so Patrick should recover quite quickly. I asked Patrick if he knew the trick to stop his finger from throbbing. He didn't - so I told him the trick is to hit his thumb with a hammer, that way you don't feel your finger any more.
Another forest of WASS. The diagonal braces are fastened to a 2x6 that are screwed to the floor (2 2x6 are fastened together at 90 degree angles for rigidity). In order to not hit the tubing for the hydronic heating, the screws are only installed in places where there are partition walls (which means there is no tubing there).
Sunday, August 28, 2005
Day 143 - the Stone tour...
(click for larger view)
Today we did a stone tour (not the Stones!) tour, although the Stones were in town today for a concert at the Ex, the first in 40 years!). This is a montage of some of the buildings we saw today. The waviness is an artefact of a not-so-hot digital camera, and is a result of slight unsteadiness of the hand when taking the picture. The Old Mill stone, Fortress Brown colour, is at the bottom right corner - this is the type of stone and colour we are leaning towards right now. Previously we were leaning towards the Citadel in Desert Brown or Monastery Beige. Freda thinks the Desert Brown has too much yellow in it and would look odd next to the green we selected for the windows' brickmould. We both think the Citadel looks quite flat (unless it has a strong light on it from the side). Mark isn't too crazy about the little stones in the mix.
Click here to see a photo of Old Mill in Fortress Brown from the Arriscraft web site. (I think this is a Cardel home, judging from the symbol around the circular vent in the middle of the photo.)
Saturday, August 27, 2005
An injury! (oh no!)
We went out to the building site yesterday afternoon at quitting time with some cold drinks for the crew and a little snack. But Patrick was missing. We inquired where he was and discovered that he had injured himself when he was trimming his hedges at home on Wednesday evening, and has five stitches to show for it! Yikes! We hope Patrick recovers quickly - get well soon.
You may also have noted that I have removed one of the "tickers" - they take up too much space for my liking and are a bit too "cutesy". The biggest drawback is that it doesn't present the information I would like it to present, so I may remove the second one too (maybe Bob Miller can help with that!).
Friday, August 26, 2005
Day 141 - Main floor is looking good!
Good progress this week. Also, the inspector came on Thursday to check that everything is okay to backfill -- that inspection passed so the backfill will start on Monday or Tuesday, as well as getting rid of some of that excess rock. Also, the appraiser from the bank came by on Friday morning to assess the construction progress in order for the bank to loan us some money to pay Charles.
(click any picture for larger view)
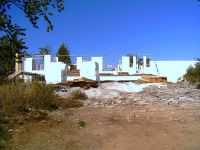
This is the site we saw as we drove up today. All of the window bucks are completed for the main level of the house (garage still to be done after backfill - the garage window bucks are sitting on the porch). The pile of lumber on the right will be used for the WASS and then will be reused for the sill plate on the top of the wall to fasten the trusses.
The great room. Wow! This feature window section with doors and transom is amazing! This room is going to be wonderfully bright. Dave sure did a great job fabricating the window bucks, laminating three layers of 3/8" plywood for the curved sections, backed by a piece of 2x12 for support. Since the ICF walls are 11" thick, the crew had to rip the 2x12 down to size (2x12s are nominally 11 1/2" wide).
Freda is standing in the solarium, in front of the patio door which looks out onto the area where we will (eventually) have a patio. Right now, watch out for that first step - it's a doozie! At the right side of the picture, there's an annoying cedar that will have to get knocked down when they are doing the backfill.
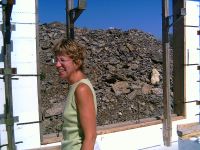
Freda is standing in front of the master bedroom window. The inspector came on Thursday to approve that everything is ready for backfilling, so that will start to happen on Monday or Tuesday.
When the basement hole was full of hoe-ram detritus, both Steve Berry and Herbert were interested in taking some away. Unfortunately, the shovel/hoe ram operator piled all the rock up and spread some out in front of the house so it became a bit problematic to move. Now we are going to need to get rid of it and so we are talking to Steve and Herbert again. If they can use it now then that will save us some money in trucking costs.
This is Charles Irvine, our builder, standing in front of the BR3/Study window after giving us a tour of the progress.
BUDGET COMMENT: The original house plan had a lot of curved transom windows (officially known as "extended arch") on most of the windows. We like that look, but it does add significant cost. In order to meet our budget, we replaced most of those transoms with rectangular windows to reduce the window cost. Of course, this also simplifies the work involved in creating the framing for the windows, etc. We did keep two curved transoms at the front of the house, a window on the garage (on the right when looking at the house from the road) and the Study/BR3 (on the left) to add a bit of style and to balance the look.
Stone selection (still in progress):
Gaetan at Merkely Supply gave us a list of several houses that were recently built with the Arriscraft Citadel stone. We drove by three of the them today - one had a 50/50 mix of the Citadel Desert Brown and cedar siding/doors which we didn't find appealling; a second was down a windy treed laneway and was not visible from the road, and the third address didn't exist!
However, we found this house on the same street as the non-existent house, and quite like the look. This is Arriscraft Old Mill in Fortress Brown (some other colours are Turret Buff and Castle Grey -- dontcha just love those names!) - we are thinking that perhaps we might like this stone more than the Citadel - it has a chunkier look, has more texture (officially called "rockface"), and has more variations in colour (look at the larger image to see it better).
Thursday, August 25, 2005
Appraiser coming tomorrow
The bank called to let us know the appraiser will be going out there tomorrow to assess the percentage completion. They will then call us in early next week to discuss everything.
Added "ticker" to the title...
I have added a "ticker" to the title of this blog.
As we all know, the Occupancy Permit is planned for January 15th, 2006, with the move shortly thereafter. (This image should update itself automagically as time passes.)
Wednesday, August 24, 2005
Day 139 - VSP on the main floor
The weather has been good (not too hot, no rain) so the crew has been able to make good progress. Today's blog entry has a lot of pictures. BTW, VSP means visible signs of progress (BTW = by the way :^).
(click any picture for larger view)
This is the sight that greeted us when we drove up to the site today. There is a lot of lumber there - I presume it will be bolted to the top of the walls in order to provide a way to attach the roof trusses.
Patrick is checking things outside the wall of the great room. The window buck is HUGE! This is actually for the doors and the transom above it. The arches at the top of the window buck are made of three strips of 3/8" plywood laminated together.
For comparison, the ICF walls are 8 courses high, which means they stand about 7'9" above the floor (this is very close to the typical tract house ceiling height.)
This shows the solarium - it is approx 12' x 14'. The feature window in the end of the solarium has the same design as the great room feature window, although on a smaller scale and without a door. The solarium has a sliding patio door on the left side.
Both the great room and the solarium have a cathedral ceiling.
This is a view looking at the porch with the window bucks for the garage stacked at left and the pile of plywood which will be reused for the roof sheathing. Of course this will not be enough for the roof!
If you look a the top of the bucks closely, you can see lots of screws protruding at unusual angles. This is to give the concrete something to grip and hold the window bucks.
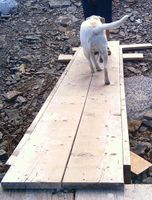
In other news.... Tawny is getting braver, but she is still afraid of the ramp and the platform. She went up the ramp numerous times today, and once (when Freda and I were both in the house) made it all the way across the platform to the wall, with her tail wagging furiously. She had a good swim and is now sleeping.
As my mum said about Tawny, "She is such a good dog!"
Time for a Bank draw
It's time to do a draw from the bank to pay for the house construction. Freda is arranging that.
Also, the inspector is coming tomorrow to approve construction to date so we can do the backfill.
We got the addresses (from Merkely) of some houses built with the same stone (Arriscraft Citadel - pdf brochure here) that we are thinking of using. We need to take a drive by them to decide.
Also, the inspector is coming tomorrow to approve construction to date so we can do the backfill.
We got the addresses (from Merkely) of some houses built with the same stone (Arriscraft Citadel - pdf brochure here) that we are thinking of using. We need to take a drive by them to decide.
Monday, August 22, 2005
Meet Jim and Cam
This is Jim Cameron, from M&T Glass. Jim showed us the many different options for the shower doors, in terms of hardware and glass. We will likely just go for plain glass with chrome-plated hardware (to match the plumbing fixtures).
This is Cam, from Roofmart. Cam told us that about the various shingles and steered us away from some that are in short supply due to a labour dispute at IKO. We are leaning toward the Renaissance XL shingles, about $70 per square. Shingles, hmmm - they all seem pretty much the same to us, as long as they keep the rain out.
Sunday, August 21, 2005
Visit from Gretchen & Doug & Sarah & Katie
Sat Aug 20th (click for larger view)
Gretchen Sangster and Doug Chapman from Waterloo visited us this weekend. This is Freda with their two girls, Katie (5, on left) and Sarah (7). Between playing with the girls, fetching the Kong and swimming, Tawny completely wore herself out that day.
We had a lot of fun visiting with Gretchen & Doug and the kids.
Day 135 - More main floor progress
Sat Aug 20th (click for larger view)
More of the window bucks are in place and the walls are creeping up. There are a lot of windows in this house, so in some cases it is challenging to brace the walls so they will stay vertical when the concrete is pumped in.
This is the view looking out of the window by the stairwell. When you are in the kitchen, we should be able to look through the kitchen doorway to see this view.
Backfill is still not completed - I think that has to be done before the walls can be completed.
It was a really overcast day, it had been raining all night.
Thursday, August 18, 2005
Finishes - exterior lights
(click for larger view)
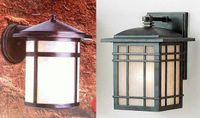
These are the exterior lights we were torn between choosing. We originally purchased the ones on the left (Snoc, from HD) but decided that we really preferred the ones on the right (Quoizel, from Living Lighting). We may not have made that decision if the LL fixtures had not been on sale!
Wednesday, August 17, 2005
Day 132 - Main floor progress
Wed Aug 17th (click for larger view)
This is the site that greeted us on Wednesday when we drove up to the house. This was our first view of the first floor when it starts to have a hint of what the house will look like. The only window buck installed in this picture is the dining room window.
Tawny decided she doesn't like heights after all.
Back online & blogging
Apologies for the long delay since the last posting.
You may have seen a blog entry for August 3rd (about the post), and then it disappeared and the latest posting you could see was on on July 23rd. This happened because - after the blog was deleted - I recovered some of the posts thanks to several people (Nancy & Kevin, Gerry and Loan) and then posted a few more. Then Christine at Blogger Support was able to recover the blog - which then kinda clobbered the other stuff. Anyway, it is all fixed now.
However, the last two weeks were incredibly hectic and I was not able to get the two blogs figured out, but now it is all sorted. I have posted a few photos. Over the next week I will add more text to a few of the photos.
Day 130 - Wanted: One Rosetta Stone
Saturday, August 13, 2005
Memories of Steve (or: crew changes)
Photo taken August 12th, 2005.
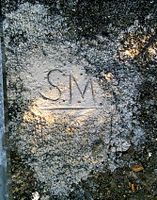
Steve Molson, one of the crew, has gone back to school to complete his edumacation. Before he went, Steve immortalized himself in a few places around the construction site, and this is one example. This will eventually be covered over by about 6-8 feet of gravel, rocks, dirt etc. This particular one is in front of the house, and will be almost directly below the steps in front of the front door. Steve joined us in May, you can see his picture in the May 27th entry.
We didn't really know Steve that well, but he was funny and energetic. Those are great qualities in a person. Thanks for your hard work Steve and good luck in school!
Friday, August 12, 2005
Day 127 - Starting on main floor walls
August 12th, 2005.
The ICF blocks and the steel for the main level were delivered and assembly of the blocks for the main floor walls has started. The walls are covered with some kind of hieroglyphics that Charles and his crew understand. I will post some photos shortly. I don't have the Rosetta Stone to decode that however.
Thursday, August 11, 2005
Tawny the mountain climber
Tawny the mountain climber.
Tawny is pretty agile, not quite like a mountain goat but she does have four wheel drive.
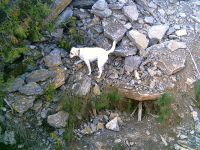
Normally when we go out to the land, Freda throws the Kong with Tawny while I take a few pictures. This time, Freda went up on the floor deck with me to see the progress, while Tawny amused herself by running around the building trying to find a way to get to us. I didn't know dogs could be afraid of heights, but Tawny is!
Wednesday, August 10, 2005
Visit with Charles & Conrad Brisson
Charles came over this evening with Conrad Brisson. We talked about a number of things
One of the things we talked about was this. We are going to install four eye bolts into the wall in various places around the house so we will have a handy place to hook Tawny's leash (or whatever) when needed. This is approximately what it will look like when it is installed. These eye bolts, washers, etc are made of stainless steel, so they won't rust, and aren't exactly cheap. Four eyebolts with assorted washers, nuts, and extension bolt cost about $72.
Conrad Brisson, master stonemason.
Conrad will be installing the stone on our house. The stucco will be installed by MSL, we haven't met them yet and haven't selected a colour. Conrad asked us to make an appointment with his contact at his supplier (Merkely). We have been to Merkely several times and have a pretty good idea of what we want to have. We just need to confirm it now.
Monday, August 08, 2005
Day 123 - Basement floor is poured
August 8th - click to enlarge
The basement floor was poured on August 8th. This first photo was taken on August 12th after a rainshower - the water from the rain shows the floor isn't exactly level. You can see the reflections of the floor joists in the water on the floor.
This photo was taken on August 8th, the day the basement floor was poured. This is the rough-in for a future basement bathroom, the plans include a shower.
Friday, August 05, 2005
Day 120 - basement floor ready for concrete
Thursday, August 04, 2005
Dog Days of Summer
This graphic from the Ottawa Citizen shows how many continuous days of hot weather we had in July, with little respite overnight. This graphic does not, however, show the impact of the constant oppressive humidity which made the heat all the more "enjoyable"...
Wednesday, August 03, 2005
Day 118 - an oversight surfaces
One of the things I have always hated about finished basements is those stupid poles, they always seem to be in the wrong place, right in the middle of the rooms. When we were laying out the "future" rooms in the basement, we made sure we avoided that.
Or at least, I thought we did...
We are also the lucky owners of a post in the middle of the room -- here is ours! I thought we had planned this out because we made sure all the support posts could be hidden in the walls, but we must have missed this in the last couple of versions. Now we have a silly post that's not hidden in the wall.
On the other hand, we have time to think about options since we're not planning to do any finishing of the basement anytime soon.
Tuesday, August 02, 2005
Google satellite view
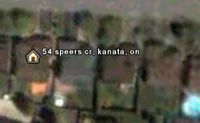
This image is from Google Earth, a satellite view of 54 Speers. Neat that you can see our cedar deck.
Check it out at http://earth.google.com.
According to Google Earth, the lat/long of our new house is: 45 deg 16' 41.88" N 76 deg 04' 24.41" W.
Check it out at http://earth.google.com.
According to Google Earth, the lat/long of our new house is: 45 deg 16' 41.88" N 76 deg 04' 24.41" W.
Day 117 - plans, R2000, etc
Plans for this week:
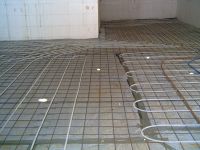
- get a crane to lift the roll bars out of the basement
- finish putting the Insul-tarp on the basement floor
- finish putting the wire mesh and the Wirsbo tubing in
- pour the floor
We got a flyer in our last Ottawa Hydro bill touting Hydro Ottawa Supports Canada’s First ENERGY STAR® for New Homes Community (pdf here). I called Hydro Ottawa to see what they meant when they say they "support this initiative". I spoke to a number of really nice people (who actually returned phone calls!!). It turns out that Hydro Ottawa is paying for an energy evaluation for the new homes in this community (about $100). I asked if our house would be eligible, and today I heard from a guy at Hydro Ottawa that yes, they would cover our house since we are planning an R-2000 house. Great!!! So I will call him back tomorrow to discuss.
In other news, we should get a Grapevine sign on our house tomorrow... Not sure if you have seen the Google satellite images (or Google Earth), but it's pretty cool. We can actually see our cedar deck behind our house.
Subscribe to:
Posts (Atom)